Creating Guest Users in PortalSafe
See Subscribing to PortalSafe and Store PortalSafe Login Credentials.
Guest users are people with whom you'd like to exchange files—such as your customer. There are two ways to set up guest users in PortalSafe from ATX:
- From the PortalSafe toolbar button in the customer's open return
- When uploading the customer's return to PortalSafe
With either method, the system will automatically create a PortalSafe guest user ID (based on their e-mail address in Return Manager) and PortalSafe drawer to store files.
You can also set up guest users directly in PortalSafe without opening ATX. For instructions, see Program Help in PortalSafe.
To create a PortalSafe guest user from an open return:
- Open the customer's return in ATX.
- Click the PortalSafe™ toolbar button.
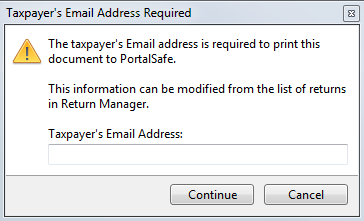
An e-mail address is required to set up a Guest User in PortalSafe. If you have not entered an e-mail address for the customer, the following dialog box appears. If an e-mail address is present, skip to Step 4.

Taxpayer's Email Address Required
- Enter the taxpayer's e-mail address and click Continue.
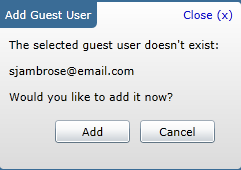
PortalSafe opens in a separate window. The Add Guest User dialog box appears:

Add Guest User dialog box in PortalSafe
- Click Add.
This creates the Guest User in PortalSafe as well as the drawer where documents can be stored for that customer. The drawer displays both the customer's name (last name, first name) and email address.
Creating Guest Users While Uploading to PortalSafe
You can set up your guest user (customer/taxpayer) at the same time as uploading the return to PortalSafe. See Uploading Returns to PortalSafe.
If you haven't already entered it, the system will prompt you for your customer's e-mail address.
See Also: